How to Root Samsung Galaxy Note 4

How to Root Samsung Galaxy Note 4


The Samsung Galaxy Note 4 is one of the best and most loved device of Samsung. However, still there are users who want to use their Samsung Galaxy Note 4 completely and want to customize it according to their wish, and we know that it is only possible with the help of rooting.


That is the only reason that, we are sharing our another guide of rooting which will be teaching you that, “How to Root Samsung Galaxy Note 4?” The complete guide and steps of your query is elaborated below, you only need to go through them and get your solution. So, don’t waste time and get your solution.
The root process which we are sharing works on most of the models of Samsung Galaxy Note 4, but the AT&T SM910A and SM910V are not supported as we are using CWM or TWRP methods and these methods are not supported on these mentioned models. Additionally, we have listed all the supported devices below too.
Caution: The Mobile warranty would be void ones the device has been rooted and it can not be claimed after by. Additionally, you will not be able to receive OTA update for Note 4 after rooting it.

How to Check Model Number On Note 4

Go to Settings >> About Device
Now, there you’ll able to see your phone’s model number. Note that number and try to find out that number in our supported models’ list.

Supported Models

There are certain specific models of Samsung Galaxy Note 4 which are supported by this rooting guide of our. You need to look up for your model if it exist in our supported models list then apply the below steps or else don’t apply these steps to root your device as it will not work for you.
  • SM-N910K – Korean KT, LG, SK Telecom
  • SM-N910L – Korean KT, LG, SK Telecom
  • SM-N910S – Korean KT, LG, SK Telecom
  • SM-N910C – Thailand
  • SM-N910F – International
  • SM-N910P – Sprint
  • SM-N910T – T-Mobile U.S
  • SM-N910R4 – US Cellular
  • SM-N910W8 – Canadian
  • SM-N910U – Hong Kong
  • SM-N910G
  • SM-N910H
  • SM-N9100
  • SM-N9106W
  • SM-N9108V
  • SM-N9109W

Learn-How to Root Samsung Galaxy Note 4

So, here are the steps which you need to follow to explore that, “How to root Samsung Galaxy Note 4?” Additionally, as we always say you that before applying the steps of rooting and Jailbreaking, don’t forget to read out the caution which is given above. Additionally, after going through the above piece of writing go through the below steps:
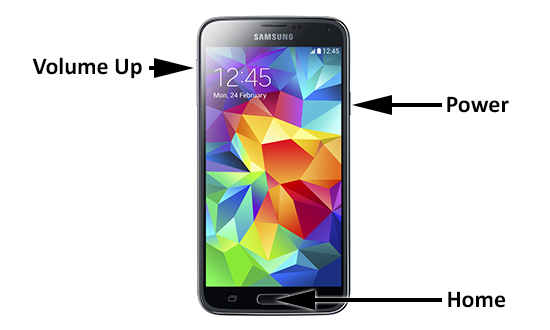
  • First of all, turn off your Note 4 then Hold Volume Down, Home and Power button altogether until you’ll have a warning message
  • After that, press volume up button to enter into ODIN Download Mode
  • Now, you need to connect your Note 4 with your computer
  • Afterwards, you need to go to this Link and you are supposed to download .tar file on your computer of your model. Let me explain it more that you need to go to that mentioned link and then download that .tar file which is mentioned there along with your model number
  • After that, you need to Download Odin and SuperSU file on your PC using these links. Odin and SuperSU
  • Once the files are downloaded. You need to Unzip Odin only and leave SuperSU as it is for time being
  • After the unzipping you would see this name odin3v185.exe with yellow icon. If you are not able to see the yellow icon then that means your Samsung USB drivers are not installed on your computer. So, for those who don’t have drivers need to unplug the USB, install the drivers and then Open the Odin file as mentioned above
  • Once Odin is launched then you need to Choose PDA button then a box will get appear on the screen which will be asking you to select a file. You need to select .tar file which you’ve downloaded in earlier steps
  • After that selection, Click on Start button and then it will start the CWM or TWRP recovery on your Samsung Galaxy Note 4
  • Then your file will be rebooted automatically, and ones it is rebooted, you need to copy the SuperSU file which you’ve been asked to download in above step and copy it to anywhere on your Phone’s storage
  • Afterwards, you need to Power Off your phone and then you need to Hold Down Volume, Home and Power buttons altogether until you see Recovery Booting on your screen, it will be shown at the top left corner
  • Now, once you are welcomed in recovery mode then you need to tap on Install or Install from SD Cardand then you need to select SuperSU file from your Phone’s storage and then tap on Install
  • Then choose Reboot System
  • Once it is rebooted then go to apps section and click on SuperSU to launch it
  • Then you may be asked to disable KNOX then select Yes for it and it may ask you to update binaries you need to select Yes and then Normal mode for it
  • This was it! If you’ve not received questions or further steps of SuperSU then you are done already
  • Congratulations! Your Samsung Galaxy Note 4 has been rooted.
How to Clear Cache on Samsung Galaxy Note 4

How to Clear Cache on Samsung Galaxy Note 4


Today we are going to make you learn that,”How to Clear Cache on Samsung Galaxy Note 4?” Additionally, we are sure that ones you have cleared the cache of your Samsung Galaxy Note 4 then you will record an awesome and clear progress on your handset.
The Cache on your Samsung Galaxy Note 4 can cause the data corrupt and crashing errors. So, it is important for you to clear the both System and App Cache on your phone. The System cache carries the cache of your system whereas the Apps cache carries the caches of your app.
If your app stops working on your Note 4 suddenly and you could not find out the reason behind it then there are much chances that it is because of app cache. So, without wasting much time of yours you are recommended to clear the cache for much solutions of your phone.

Learn-How to Clear Cache on Samsung Galaxy Note 4

So, here are the steps which are supposed to be followed by you guys in order to clear cache on Samsung Galaxy Note 4. The guide is made quiet simple in order to make you learn easily. Now, without taking much time of yours I would request you to get towards the below steps:

Clearing System Cache

First of all, you are going to learn to clear the system cache on your Samsung Galaxy Note 4. Then we’ll move towards app cache.
  • Press and Hold; Power, Volume Up and Home Button altogether and wait until the phone vibrates and ones it is vibrated leave all the buttons.
  • Now, you will be in recovery mode. Afterwards, you need to use the volume button to move up and down and select the Wipe Cache Partition.
  • After that, it’ll ask you about the confirmation. You need to press the Power button to confirm it.
  • Then you need to select Reboot System Now and again and then hit Power button to confirm it.
  • Now, wait until it is restarted again.
  • This was it!

Clearing App Cache

This is final section of this post which is going to applied in order to clear the app cache of your Note 4. You need to apply the following steps in order to make this work for your device.
  • First of all, Swipe the Notification Center to bottom and tap on Settings.
  • Now, you need to move towards the Application section and then tap on Application Manager.
  • Afterwards, you will have all your apps. Now, here you need to clear the app cache one-by-one of each app. You need to tap on any app whose cache you want to clear.
  • Ones you have tapped on any app, you need to tap on Clear Cache button.
  • This was it!
How to Factory Reset Samsung Galaxy S5

How to Factory Reset Samsung Galaxy S5


The Factory Reset is one of the common and most important feature which has been kept in all Android phones. When your Android phone get stuck and you start receiving different useless pop up ads, and simply it messes up your phone then in that case Factory reset is the best option.


The method and procedure for performing Factory Reset on Android is different on each. Therefore, today we are going to make you learn that,”How to Factory Reset Samsung Galaxy S5?” You can easily follow this guide in order to factory reset your S5 with complete ease.

Learn-How to Factory Reset Samsung Galaxy S5

Here are the ticks and steps which you are supposed to follow in order to make you learn that,”How to Factory Reset Samsung Galaxy S5?” We have tried our best in order to make this guide as simple as it could be. You need to follow the steps with great care in order to avoid any error which may occur. We have shared two method for this in order to provide you the best convenience.
Note: *Backup your Data Before Applying the Below Steps.

1- General Method

This is the simple and most simple method which could be used to Factory Reset Samsung Galaxy S5 using the same traditional method. Get to the steps to explore more about it.
  • First of all, go to Settings and then go to Backup and Restore section.
  • Now, in the bottom look for Factory Data Reset. Tap on it and confirm the factory reset.
  • You are Done!

2- Alternative Method

This is an alternative method for most critical cases. If your phone is completely messed up and it is taking much time for opening and all then you must try this method for Factory Reset. Get to the below steps to explore more about it.
  • First of all, turn off your Samsung Galaxy S5.
  • Now, Press and Hold Power, Volume Up and Home Button. Keep holding until you enter into a recovery mode.
  • After that, use Volume button to move up and down and move towards the Wipe data/factory reset and then hit the power button to confirm.
  • Afterwards, you need to select the Yes using the Volume key and then move towards the Reboot System Now.
  • This was it!
Top 5 Tricks to Save Battery Life of Samsung Galaxy S6

Top 5 Tricks to Save Battery Life of Samsung Galaxy S6


Have you got your Samsung Galaxy S6 and facing the battery life problem? Do you want to boost or increase the battery life of your S6? Then your wait and search is over, as I have got some of the best tricks to save battery life of your Samsung Galaxy S6.


The Samsung Galaxy S6 is the latest update, and it is being loved by many users too. However, the battery is running out due to the auto enabling of certain features. So, to overcome your battery issue, I have gathered the top 5 tactics which will definitely help you to save battery life of your S6.

Top 5 Tricks to Save Battery Life of Samsung Galaxy S6

So guys your wait is over now as the tricks which you need to follow are listed here. I would recommend you to go through them and then start applying and I am sure that you will be saving much part of your S6’s battery life.
Start Applying these tricks!

Disable Pre Installed Apps

The Samsung Galaxy S6 comes up with certain kind of apps which are being pre installed there. If you don’t like those app then to disable them would be a sensible move.  As if you will not disable those apps then it would keep on updating those app and we all know that such updates will consume battery life.
That is why, I am suggesting you to disable those apps from your side if you are not using them. You simply need to search out for those app, which would be around 15 apps, and then disable them if you don’t want them for your phone.

Turn off VoLTE

This is for the United States users and the users where VoLTE is enabled by default. If you are the one where VoLTE works then you must turn it off. Since, it is recorded that in S6, the VoLTE is playing its role to drain its battery life. So, I would recommend you to turn it off for your S6 and for that follow these steps;
You need to go to Settings >> WiFi >> More and then tap on Smart Network and Switch it Off.

Enable Power Saving – Ultra Battery Saving Mode

This is another trick which must be quiet common for many of you and I would also recommend you to enable this feature for your Samsung Galaxy S6. When you’ll enable it for your phone then it will automatically adjust the settings of your phone which will ultimately help you to save the battery life of your phone.
Additionally, the battery saving mode of S6 is far more powerful than others saving’s mode. It actually helps you to save your phone’s battery. To enable this follow these steps:
Go to Settings >> Battery >> Now tap on Ultra Battery Saving Mode.

Update Samsung Push Service

This  an official update by Samsung which is being proven helpful to save the battery life of your S6. You can easily install this update for your phone from Google Play Store. Ones it is installed then it will automatically fix the battery life issue of your Samsung Galaxy S6. Install this app for your S6 from this Link.

Turn Off Extra Features

The last trick which you need to apply and can easily save the battery life of your newly bought Samsung Galaxy S6 is by disabling the all extra features of your phone. The extra features may be Bluetooth, WiFi, Radio, Extra Gestures and other useless features which you are not using for time being.
If you are not using these features and still they are enabled then it start consuming or keep searching for related mean which will cause the battery consumption for sure and will drain out the battery of your phone for sure. So, I would recommend you to keep those features off if you are not using them.
How to Root OnePlus One and Install Oxygen OS

How to Root OnePlus One and Install OxygenOS

The OxygenOS is now officially released for OnePlus One and can be installed on it by applying some sort of steps. Additionally, there must be many users who are not acquaint with the process of doing so. Therefore, today I am going to share a guide with you guys which will be making you learn that, How to root Oneplus One and install OxygenOS?


OnePlus One is one of the best Android smartphones released in the year 2014 and it continues to dominate the smartphone market with its high-end configuration and smarter pricing. Recently OnePlus has released the Oxygen OS (which is based on Android 5.0 Lollipop operating system) for all the OnePlus One devices. You can get it via automatic update in the next few months but if you don’t wait that long, then you are in the right page. Here, I have given a step by step tutorial to install Oxygen OS in OnePlus One Android smartphone. Follow the instructions carefully and enjoy the Oxygen OS ROM features today.


How to Root OnePlus One and Install OxygenOS


Prerequisites:

1) Before getting started with the installation of Oxygen OS, make sure that you have taken a complete backup of all the data in your smartphone using appropriate apps as Oxygen OS installation process will wipe out all your smartphone data. After installing the Oxygen OS, you can recover the data by using this backup.
            Caution: Backup your OnePlus One before applying these steps.

Step 1) Root and Unlock Bootloader OnePlus One

The first steps of this guide is to root and unlock bootloader OnePlus one in order to install OxygenOS on your device. The steps for rooting and unlocking bootloader OnePlus is completely mentioned below. Additionally, I am again emphasizing you to backup your phone before applying the steps in order to be on the safe side.
  • First of all, Install the ADB and fastboot file on your computer from this Link, and then extract it on the desktop as it will be a rar file.
  • Now, turn off your phone and then Press Volume up and power button then you will be welcomed into fastboot mode.
  • After that, connect your OnePlus one to your computer using USB cable and then go to the folder where you have installed the ADB and fastboot file on your computer and right click on it and then click onOpen Command Window here.
  • Furthermore, you will have command prompt window, Now you need to write the following command there and then it will list all the connected device with your computer. If it is not showing OnePlus One then that means your phone’s driver is not installed.
fastboot devices
  • After that, run the following command to unlock the bootloader.
fastboot oem unlock
  • After you have run the above command then run the following command.
fastboot reboot
  • Now, your phone will be rebooted in few minutes.
  • Afterwards, you need to go to Settings >> About Phone >> then tap on Build no 7  and it will enable the developer mode.
  • Now, again go to Settings >> Developer Options >> then enable USB Debugging.
  • Furthermore, again go to Settings >> Developer Options and then toggle off/disable the Update Recovery with System Updates.

Step 1.1) Installing TWRP

  • First of all, Install TWRP recovery program on your computer by Clicking Here.
  • Ones it is downloaded, rename it as recovery.img and then copy that file and paste it into the ADB and fastboot folder which you’ve downloaded in above step.
  • Now you need to turn off the phone and then Press Volume Up and Power button to enter into fastboot mode.
  • Then you need to open new Command Prompt on your computer and then run the following command
fastboot flash recovery recovery.img
  • After running the above command then run the following command.
fastboot reboot
  • Now, it will reboot your phone and ones it is restarted then it will install the TWRP on your OnePlus One.

Step 1.2) Root Oneplus One

  • Now, you need to Download SuperSU on your computer from this Link then move that file to your phone.
  • Afterwards, enter the Recovery mode by pressing Volume Down and Power button on your phone.
  • Then you need to go to Install and browse the SuperSU file which you’ve recently downloaded, select that file to install and then swipe to confirm the installation.
  • After that, tap on Reboot and now your OnePlus one is successfully rooted.

Step 2) Installing OxygenOS

This is the second and the last step of this tutorial in which you are supposed to install OxygenOS. Ones you have followed all the above steps correctly then you are ready to go for this last step. Now, get to the below steps to know more about it.
  • After following the above steps you need to install the OxygenOS file on your computer by ClickingHere.
  • Now you need to extract that file on your computer as it is a zip file. You will have two different files on the folder, we need only .zip file.
  • Then turn off your phone and then Press Volume Down+Power button to enter into the recovery mode.
  • Afterwards, you’ll be welcomed in Recovery Mode. Now select Wipe option and Delete Dalvik Cache, Cache and Data.
  • Then you need to go back and tap on Install button and then browse the .Zip file which you’ve downloaded in above step and then select OxygenOS zip file and confirm the installation process.
  • After getting succeed message you need to turn off your device and then it will successfully install the OxygenOS on your phone.
  • Enjoy using it!
Using the Motion Launch gestures on the HTC One M8

Using the Motion Launch gestures on the HTC One M8


Double Tap to Wake

This is quickly becoming an essential for any Android device, and will likely be the standard way to unlock your device by the end of the year. HTC have implemented this feature in the One (M8) and it's a good thing too, because the M8 is a pretty darn tall drink of water, and reaching all the way up to the top power button is no mean feat when using one hand. It works exactly the same as it does on the LG G2.

Side swiping

There's two side-swiping gestures available to the M8, both of which mirror the effect you'd get if your screen was unlocked. Swiping from left to right will bypass your lock screen and open BlinkFeed. Swiping from right to left will bypass your lock screen and open your widget screen. Strangely, in our video test, this widget gesture didn't work (although it had worked before we started shooting) and instead took us directly to the home screen.

Up and down

Swiping up on the One (M8) will perform a basic unlock and take you to your home screen the same as double tap to wake, while swiping down will unlock and turn on voice dialing. In our video we didn't have a SIM card inserted, but I'm sure you can imagine how it works just fine. Some of these gestures seem a little redundant to me, so being able to set your own gesture actions like you can with many custom launchers (although not from a screen-off state) would be a perfect next step.


Camera launch

Other than double tap to wake, the best Motion Launch gesture in my opinion is the M8 camera launch shortcut. From a powered off screen, just pick up your phone in portrait mode and press the volume button to immediately launch the camera app. This will even bypass any security passwords that you have enabled (like PIN, pattern lock etc). Although you can see a thumbnail of the last photo taken, you will be required to input your password to access the gallery.

Other stuff

Motion Launch gestures are affected by whether or not you have a lock screen in place – for some you will be taken to your lock screen, for others, straight to your home screen. You can also bypass the lockscreen entirely if you also have security enabled (like a pattern or PIN lock), so when you use a Motion Launch gesture you are taken straight to the security screen. This option is changed in your M8's Security menu. If your sensors are covered, none of the Motion Launch gestures will work, so there's no fear of pocket launching either.


HTC One M8 camera hands-on video

HTC One M8 camera hands-on video 


Yesterday we took an in-depth look at the camera and its features on the HTC One (M8), and today we were able to demonstrate the many features on the UltraPixel duo camera in our hands-on video, such as 3D effects, UFocus, filters and more.


Throughout our hands-on test of the HTC One M8 camera, we got through the various features and explain them one by one. HTC was able to put some really cool features on its new flagship, though many could be considered a tad gimmicky, such as the stickers and ''Seasons'' (leaves, snow etc) overlays.
The duo camera allows for more depth information in the pictures, which gives us some nice features like UFocus and 3D Dimensions Plus, the first allowing you to manually choose the focused and blurred parts of the pictures, while the second makes the image appear 3D, allowing you to save the picture in a brand-new angle.
Manual mode is a highlight for the camera believe it or not, because you are able to adjust the various settings in a very intuitive way, like white balance, contrast, ISO, shutter speed and then actually see the changes on the viewfinder screen before even taking the picture. The same goes for HDR and the other modes, so there is a lot less surprise in the end result. All this and more is demonstrated in the video. With these added features, HTC is catching up to Samsung in terms of the amount of camera features and may have even surpassed their rival in certain areas. Check it out for yourself in as we explore the various features.
Nokia lumia Enable Double-Tap to Wake in Windows 8.1 Phone

Nokia Lumia Enable Double-Tap to Wake in Windows 8.1Phone


If you have a compatible Windows Phone 8.1-based smart phone, you can enable a feature that lets you double-tap your handset's screen to wake it up. This can often be much more convenient than the normal method for doing so, which requires you to pick up the phone and press the power button.
Here's why you want to enable this: If you ever leave your phone sitting on a desk, table or other surface and want to view the lock screen to see whether anything has happened—by glancing at the notifications—it can be inconvenient to have to pick up the device so you can press the power button.
But with double-tap to wake, you don't need to pick up the phone: You can just double-tap the screen and go from there. And even if some notification requires you to sign in and display an app, you still don't need to pick up the handset. You can do all of it by tapping the screen.
Here's a short, shaky-hand video showing how it works. (Hey, I was on a plane.)

The trick, of course, is that double-tap to wake is not available on all phones. You need Windows Phone 8.1, of course, and it works on virtually all 8.1-equipped Lumia handsets. But it is also starting to appear on non-Microsoft/Nokia devices, including the HTC One M8 for Windows.
To enable double-tap to wake, open Settings and navigate to Touch. (It's way down at the bottom with the other Lumia settings apps, usually. On the HTC One, you can find it in Motion Launch settings instead.


Then, change the Wake up option to On.
That's it: You can now double tap the screen to wake up your phone more easily.
Note: Double-tap to wake and Glance are different functions and have no dependencies on each other. So you can use double-tap to wake on handsets that don't support Glance—like the Lumia 735—or you can use them together on phones that do support both.

How to Enable Copy paste in CMD – Windows

How to Enable Copy paste in CMD – Windows


By Default Windows do not allow users to Copy text and Paste it in Command prompt Or Copy text from Command prompt and paste it elsewhere. But there is an option in CMD itself to enable Copy & Paste Text in Windows Command Prompt.
Today in this tutorial we will learn how to Enable Copying and Pasting Texts in Windows Command prompt. One of the main advantage of this will be that you can copy any command that you find on the internet or from any word/excel file and paste it directly in CMD and execute that command just like that.

How to Enable Copy Paste in CMD

Step 1: Open CMD, Just type CMD in search or Press Win + X key to select Command Prompt.
Step 2: Right Click on the Title of the CMD window and Select Properties just like its shown in the below Picture


Step 3: You will see a Pop up Window coming up, Now on the Right hand side, Under Edit Options, Just Check Quick Edit Mode and click OK
Step 4: Everything is Done, Now just Copy any Text from Here or Anywhere else Using CTRL + C keys and just Right click using your mouse on CMD. You will see that the text is been pasted automatically in CMD. Please Understand that Using CTRL + C to Copy text is Important.
Likewise if you wish to Copy Text from CMD to paste elsewhere then Just Select the Text in CMD and Again just Right Click with the mouse. Your Text is Copied and ready to Paste it in any Document you want.
This Doesn’t Limit you to just Text you can even copy File or Folder path and paste it in CMD. Everything that you have to type manually can be copied from somewhere and pasted directly to CMD with this small Tweak
So this was just a small Tip I wanted to Share with my Readers so that you don’t have to Type any long Command in CMD which if typed incorrectly can cause errors. I hope this will help some Of you.

How To Recover Deleted Facebook Messages, Pictures And Videos


How To Recover Deleted Facebook Messages, Pictures And Videos


Hello friends today I’m come with another Facebook trick. I find some queries from internet, many people want to recover deleted Facebook messages, pictures and video. But they don’t know about Facebook new feature but here we discuss about this feature.

I am surely said that when you go on Google and search for this queries “how to retrieve Facebook messages” OR “Recover deleted Facebook messages” then you can find lots of fake post and article there. This is time wasting to read fake posts. That’s why I guide you how you can get back deleted txt massages and photos. Continue reading…

Recover-deleted-facebook-messages

Recover Deleted Facebook Messages, Pictures And Videos With Date:

Follow my easy steps and get back deleted text messages, recover deleted pictures, videos and also get back your all profile data.
1. Login into your Facebook account and go to setting after it navigate to General account Settings.
2. Now you can see the Download a copy of your Facebook data, now click on download a copy link.
3. After clicking on link this will open a new page and on this page you can see download archive button. Click on it, after clicking it want you password and asking security question by Facebook.
4. Now you get message by Facebook – “the download link will be sent to your email id which you used to create your Facebook account.
5. Wait for a minute, check your e-mail, now you can see that you received Message from Facebook with download link. Click on download link can download zip file.
download archive

6. After downloading zip file extract it and find you lost messages, pictures and videos:)
Note: After extracting you will find the .HTML file so double click on file and chose your browser and see the data. “ IT IS Very EASY” 😀
How To Recover Deleted Facebook Messsages, Pictures